
Though WPF is not meant for complex 3D implementations, the Viewport3D is a quite powerful feature. You can implement small 3D Animations to improve your design, the usability and so on.
However, the usage of this Viewport3D is not easy going. Usually (at least I do) you have created an 3D Object in a 3D Modeling Application such as 3DS MAX or Cinema 4D and now you want to import it into your WPF Application. The Viewport3D accepts vectors, so for example you can export your object to a XAML (those plugins usually are not for free) and then somehow fiddle it into there. Fortunately there is the Helix Toolkit which is making life a lot easier!
I will show you how to get started from scratch and how to import and move Objects.
Setting up a new VS Project
First of course we need a new Visual Studio C# WPF Project, I don’t know which Version is required for the Helix toolkit, I tested it with VS2012 and VS2013 on .NET 4.5 which both worked fine.
Now we need the Helix Toolkit, you can either use NuGet or download the binaries from here I will explain how to do it with NuGet briefly. Right click on the Project in the Project Explorer->manage NuGet Packages, search for helix and install the toolkit and the WPF package.
thats it 😉
Preparing the 3D Objects
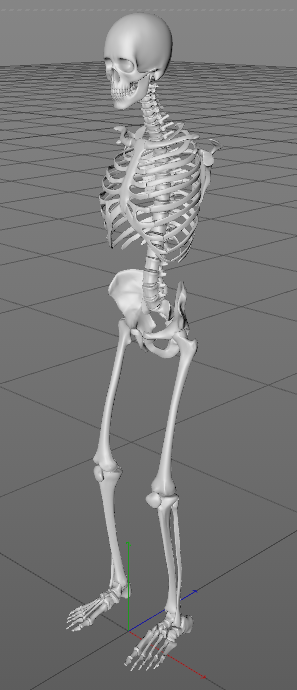
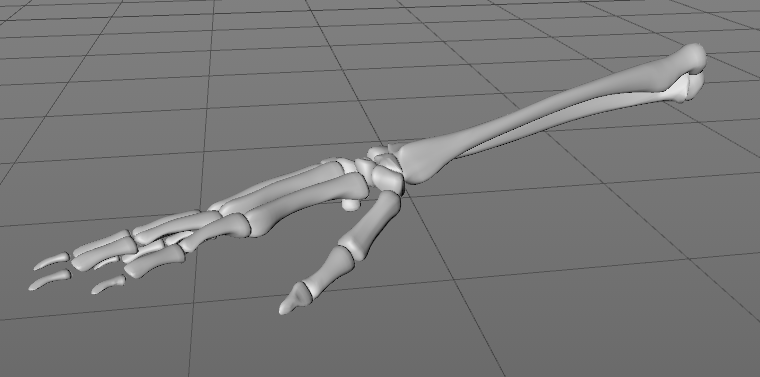
So now that we have the Helix Toolkit installed we can take care of the 3D Model. For this example I will use one of the most remarkable things on earth, the human body. Fortunately there are very detailed 3D models freely available on the web. I will use this feller here for the use with Cinema 4D, this is just an example, if you have no access to Cinema 4D don’t worry.
After the Model had been loaded into Cinema 4D (may take some while) we can take away all the unwanted “parts”. I want to make it possible to move the arms with 2 sliders in WPF, so we need a few bones, the skeleton itself, the upper arms (lat.Humeri) and the lower arms (lat. antebrachia). The model unfortunately has the left and right bones in one object, so we need to fix this.
Here you can see the groups I created:

Now I separate the 2 sides sinister is latin for left and dexter means right (at least thats what I believe)

In the next step we prepare the bones to be imported into the Helix Toolkit.
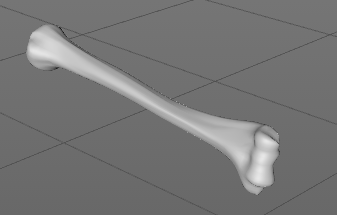
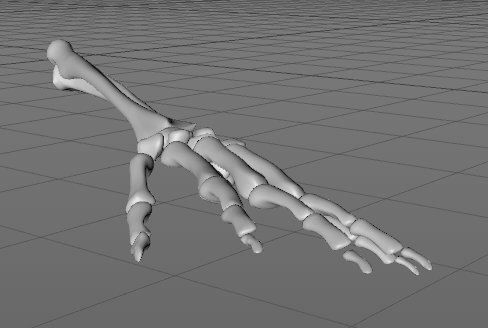
All the different groups need to be saved into single files. So we simply copy each bone (or group of bones) into an own project and export it. Those are the groups which will be moved later on. So in this case we have 5 Groups:
- Skeleton
- humerus sinister/dexter
- antebrachium sinister/dexter
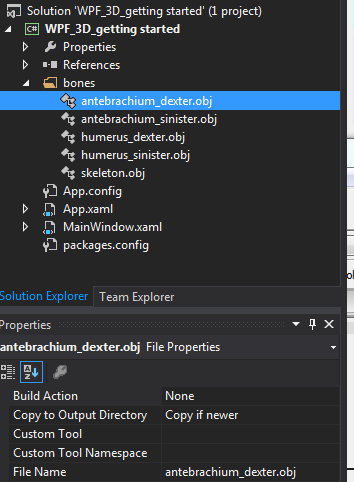
I created a folder in the VS Project called “bones” where those 5 files will go to. I have started with the Skeleton, copy the bones into a new project and do NOT change anything, otherwise the bones will not fit when we try to recombine them. Simply export the project to a “.obj” file (File->Export), leave all settings on default. Helix accepts different formats, I have tried also 3ds which also worked fine.
We end up with 5 files:

You may note that the Material has changed, this is because the .obj format has no properties for materials as a .c4d file for instance. However, you might want to use a format which is supporting color (e.g. 3ds). Its also possible to change the material in code.
Importing the Objects into Visual Studio
Now we want to import the .obj files into WPF. Thanks to the Helix Toolkit this is easy.
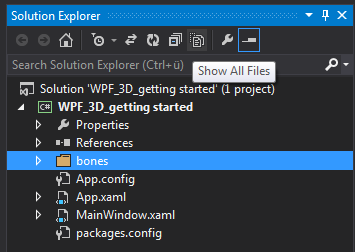
As the .obj files now belong to the project we need to add them to the Solution Explorer, therefore we need to click “show all files” and then right click on “bones” and “include in project”. Then we need to make sure that the files in “bones” are always copied to the output directory if there is a new version available.
Great! Now we can start coding!
The coding part
In this example I will keep it simple by not creating own classes and instead make everything happen in the “MainWindow.xaml.cs”, this is not a good stile but I think for this example its sufficient.
I defined a few global variables which represent the parts of our 3D Model.
First we need a
Model3DGroup skeleton;
which is representing the group of our 5 “independant” parts. Now that we have the group we need the 3D Models itself:
        Model3DGroup skeleton;

        Model3D rest;
        Model3D humerus_sinister;
        Model3D humerus_dexter;
        Model3D antebrachium_sinister;
        Model3D antebrachium_dexter;
In the Constructor of the “MainWindow” we also define a “ModelImporter” which is loading our .obj files. We end up with:
 public partial class MainWindow : Window
    {
        Model3DGroup skeleton;

        Model3D rest;
        Model3D humerus_sinister;
        Model3D humerus_dexter;
        Model3D antebrachium_sinister;
        Model3D antebrachium_dexter;

        public MainWindow()
        {
            InitializeComponent();

            ModelImporter importer = new ModelImporter();

            skeleton = new Model3DGroup();

            //load the files
            rest = importer.Load(@"bones/skeleton.obj");
            humerus_sinister = importer.Load(@"bones/humerus_sinister.obj");
            humerus_dexter = importer.Load(@"bones/humerus_dexter.obj");
            antebrachium_sinister = importer.Load(@"bones/antebrachium_sinister.obj");
            antebrachium_dexter = importer.Load(@"bones/antebrachium_dexter.obj");
        }
    }
Now its a good time to to hit “Start” to see if there had been any errors. Make sure you click through the Exception tree to find the root cause which is most likely that there was a typo or you have not copied the file to the output directory. If it is startable we can move on.
On the “MainWindow.xaml” we now need to add the parts we need. But first things first, first we need a reference to the Helix Toolkit
xmlns:HelixToolkit="clr-namespace:HelixToolkit.Wpf;assembly=HelixToolkit.Wpf"
. Now we can add 4 Sliders and a “HelixViewport3D”. I copied the source from on of the Helix Samples and modified it slightly.
<Window x:Class="WPF_3D_getting_started.MainWindow"
        xmlns="http://schemas.microsoft.com/winfx/2006/xaml/presentation"
        xmlns:x="http://schemas.microsoft.com/winfx/2006/xaml"
        xmlns:xctk="http://schemas.xceed.com/wpf/xaml/toolkit"
        xmlns:HelixToolkit="clr-namespace:HelixToolkit.Wpf;assembly=HelixToolkit.Wpf"
        Title="MainWindow" Height="546" Width="721">
    <Grid Name="overall_grid">
        <!-- Sliders to move the model -->
        <Slider Value="{Binding humerus_sinister_angle}" Maximum="90" Minimum="-90" Height="29" VerticalAlignment="Top" />
        <Slider  Value="{Binding antebrachium_sinister_angle}" Maximum="90" Minimum="-90" Height="29" VerticalAlignment="Top" Margin="0,30,0,0" />
        <Slider Value="{Binding humerus_dexter_angle}" Maximum="90" Minimum="-90" Height="29" VerticalAlignment="Top" Margin="0,60,0,0"/>
        <Slider  Value="{Binding antebrachium_dexter_angle}" Maximum="90" Minimum="-90" Height="29" VerticalAlignment="Top" Margin="0,90,0,0" />


        <!-- The HelixViewport3D supports camera manipulation, and can be used just like the Viewport3D -->
        <HelixToolkit:HelixViewport3D ZoomExtentsWhenLoaded="True" Margin="0,63,0,0" Name="m_helix_viewport">

            <!-- Remember to add light to the scene -->
            <HelixToolkit:SunLight/>

            <!-- The content of this visual is defined in MainViewModel.cs -->
            <ModelVisual3D Content="{Binding our_Model}"/>

        </HelixToolkit:HelixViewport3D>
    </Grid>
</Window>
You can see that we have a few bindings. I bind the slider values the movement of the arms and the “ModelVisual3D” is binded to a model called “our_Model”, those variables have not been defined in code yet so lets move on.
Back at “MainWindow.xaml.cs” we need to add “our_Model”, it need to be public so it is accessible by the GUI and needs to have a setter and getter in order to be bindable.
public Model3D our_Model { get; set; }
back in the constructor we need to add the 3D Models to the group, set the data context of the viewport and assign our group of objects to “our_Model”.
            skeleton.Children.Add(rest);
            skeleton.Children.Add(humerus_sinister);
            skeleton.Children.Add(humerus_dexter);
            skeleton.Children.Add(antebrachium_sinister);
            skeleton.Children.Add(antebrachium_dexter);

            //skeleton is complete assign it to the global variable
            this.our_Model = skeleton;
To sum it up, we have 5 bones/objects which we group to one “Model3DGroup” and then assign this group to a public accessible 3D Object.
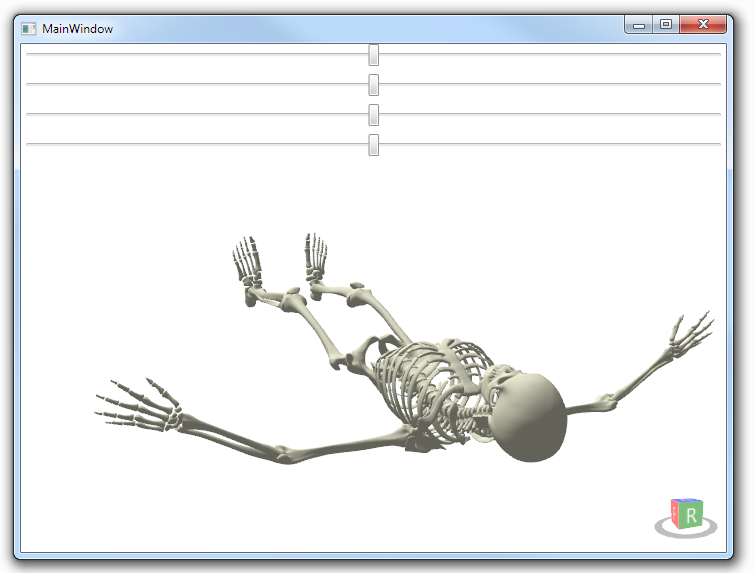
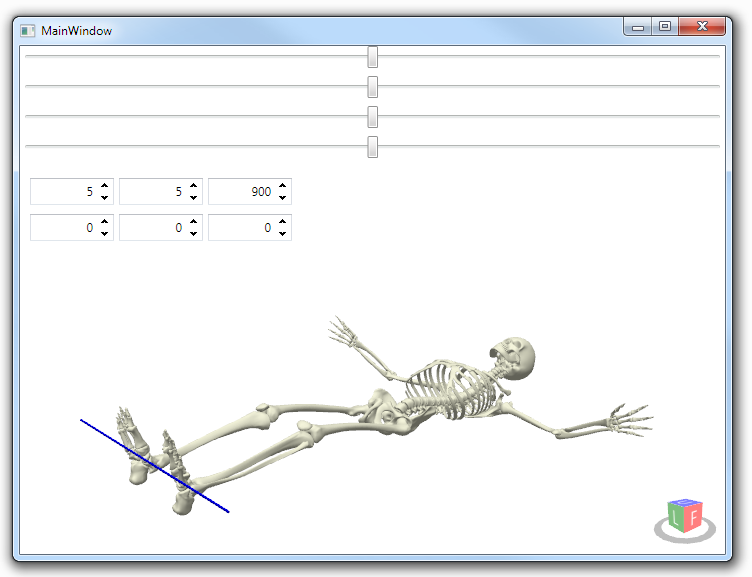
Now its time to give it a try:

Its doing something! But… its blue… and its laying on the ground. Well but before going further first lets see how to control that view. On the lower right you have a small cube which you can use for navigation by simply clicking the sides of the cube.
Before you try to use the mouse or the keyboard to move the object make sure it has the focus by clicking on it. You can use the arrow key or the mouse to move it.
Use the Arrow keys to move around the object and press “SHIFT” simultaneously to change the center, use “CTRL” to move slowly. Use the Mouse wheel to zoom or “CTRL” and the mouse. You can use the mouse to freely look around by holding the right mouse button and move around, press “SHIFT” simultaneously to change the center. This is just a brief description, there are more controls available.
First lets get rid of this blue color. You can either go for another file format such as “3ds” to include the color there or you set the color when you import a file. It is possible to change the color after the 3DModel had been created but I have not figured out how to do it. However, lets go for the dummy approach 😉
            Material material = new DiffuseMaterial(new SolidColorBrush(Colors.Beige));
            importer.DefaultMaterial = material;
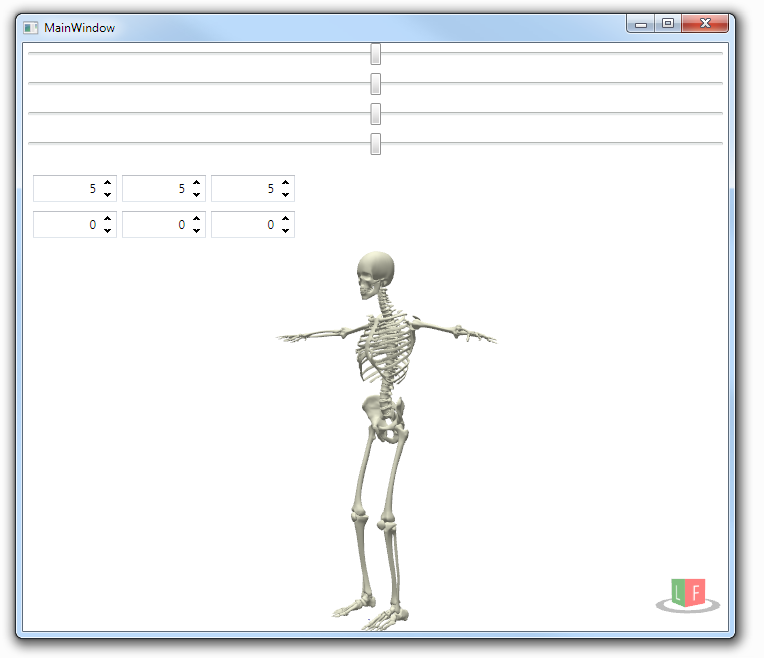
Will result in:
The fact that the skeleton is “laying” and not standing upright has to do with the files we have exported, so either you rotate the skeleton in C4D or you transform the skeleton in Code.
Lets do it in Code so we have a good starting point to talk about transformations.
If we want to rotate something we need 3 things.
- A Point where the center of rotation is
- A vector which is describing in which direction the axis points
- An angle
A small helper to find points in the 3D world
We can use the cube on the bottom right to get an idea where X,Y and Z are and therefore the vector is easy but how to get the point on which we want to rotate? Im sure you somehow can figure that out by checking the size of the objects but I did it the “dummy way” by placing a small cube in the 3D world which I can move around, this way I can move it until it is at the desired point and simply look up the coordinates.
So first I add a small grid with some controls, I love the “Extended WPF toolkit” (NuGet) and I installed it to have some nice numeric controls, if you don’t like it, choose a control of your choice. If you go for the “Extended WPF toolkit” don’t forget to add
xmlns:xctk="http://schemas.xceed.com/wpf/xaml/toolkit"
to the XAML header after the installation. The code for the Grid is:
        <Grid Name="boxcontrol" Height="81" VerticalAlignment="Top" Margin="0,63,0,0">
            <xctk:DecimalUpDown Value="{Binding boxheigth}" Margin="10,8,0,0" Height="27" VerticalAlignment="Top" HorizontalAlignment="Left" Width="84" />
            <xctk:DecimalUpDown Value="{Binding boxwidth}" Margin="99,8,0,0" Height="27" VerticalAlignment="Top" HorizontalAlignment="Left" Width="84" />
            <xctk:DecimalUpDown Value="{Binding boxlength}" Margin="188,8,0,0" Height="27" VerticalAlignment="Top" HorizontalAlignment="Left" Width="84" />

            <xctk:DecimalUpDown Value="{Binding boxX}" Margin="10,44,0,0" Height="27" VerticalAlignment="Top" HorizontalAlignment="Left" Width="84" />
            <xctk:DecimalUpDown Value="{Binding boxY}" Margin="99,44,0,0" Height="27" VerticalAlignment="Top" HorizontalAlignment="Left" Width="84" />
            <xctk:DecimalUpDown Value="{Binding boxZ}" Margin="188,44,0,0" Height="27" VerticalAlignment="Top" HorizontalAlignment="Left" Width="84" />
        </Grid>
Now that we have the controls we need to have an object to move around. I took a box for that.
            mybox = new BoxVisual3D();
            mybox.Height = 5;
            mybox.Width = 5;
            mybox.Length = 5;
            m_helix_viewport.Children.Add(mybox);
            boxcontrol.DataContext = this;
And now the parameters, the box does not support binding therefore my dummy solution:
public double boxheigth
        {
            get            {                return mybox.Height;            }
            set            {                mybox.Height = value;            }
        }

        public double boxwidth {
            get {            return mybox.Width;        }
            set {                mybox.Width = value;            }
        }

        public double boxlength
        {
            get { return mybox.Length; }
            set { mybox.Length = value; }
        }


        public double boxX
        {
            get { return mybox.Center.X; }
            set { mybox.Center = new Point3D(value, mybox.Center.Y, mybox.Center.Z); }
        }


        public double boxY
        {
            get { return mybox.Center.Y; }
            set { mybox.Center = new Point3D(mybox.Center.X, value, mybox.Center.Z); }
        }

        public double boxZ
        {
            get { return mybox.Center.Z; }
            set { mybox.Center = new Point3D(mybox.Center.X, mybox.Center.Y, value); }
        }
now there is a small cube which we can resize and move around.
So it seems like we have already found our point and vector to move the skeleton. Now we can rotate it:
            RotateTransform3D myRotateTransform = new RotateTransform3D(new AxisAngleRotation3D(new Vector3D(1,0,0), 90));
            myRotateTransform.CenterX = 0;
            myRotateTransform.CenterY = 0;
            myRotateTransform.CenterZ = 0;
            skeleton.Transform = myRotateTransform;
We rotate on the X axis and the Point is 0,0,0. Its good practice to play around with those values so you will get an idea what is going on.
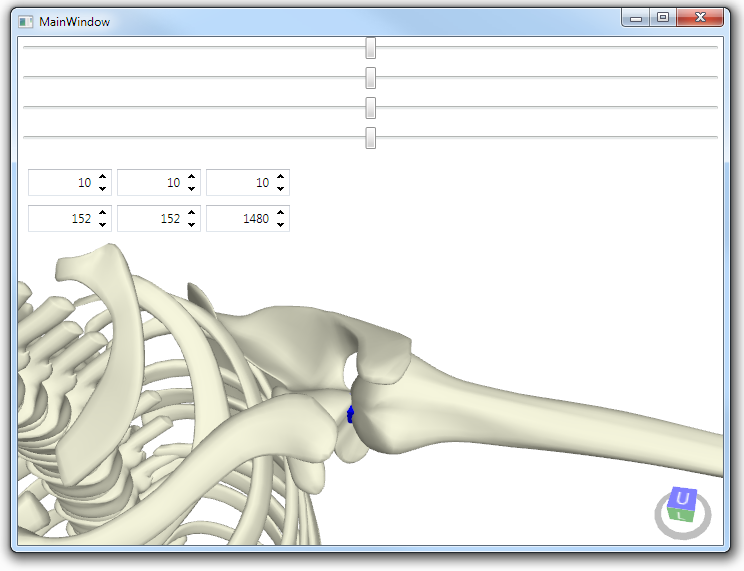
Now we only need to find the point where we want to rotate the humeri.
Lets start with the left Humerus
I’m not a physician but it seems to be ok:
In Code:
        //moves humerus sinister
        void move_humerus_sinister(double angle)
        {

                        //rotate the object by "angle", the vector describes the axis
            RotateTransform3D humerus_sinister_transform = new RotateTransform3D(new AxisAngleRotation3D(new Vector3D(0, 1, 1), angle));

            //tells where the point of rotation is
            humerus_sinister_transform.CenterX = 152;
            humerus_sinister_transform.CenterY = 1480;
            humerus_sinister_transform.CenterZ = -152;

            //apply transformation
            humerus_sinister.Transform = humerus_sinister_transform;
        }
Wait! What? why is Y and Z flipped and Z is negative?
Remember when we rotate the whole thing? Its the WHOLE thing, including its points. As we have rotated on the X axis on Point 0,0,0 this calculation is easy. For others its a bit more tricky. Luckily there is a way out. Either you measure the points before the transformation or you write a small helper which could look like this:
            var Group_3D = new Transform3DGroup();
            Group_3D.Children.Add(new RotateTransform3D(new AxisAngleRotation3D(new Vector3D(1,0,0), -90)));

            Point3D my_point = Group_3D.Transform(new Point3D(152,152,1048));
This will rotate the point back by 90 degree and we get the point we looking for.For small Objects a helper like this might be useful but for more complex ones it is a pain.
Lets move on to the antebrachium sinister as somehow this looks a bit strange right now:

Note that as we have a different vector the movement is now 45°
So every time we move the humerus we also need to move the antebrachium, well thats easy:
antebrachium_sinister.Transform = humerus_sinister.Transform;
But now things start to get interesting if we want to rotate the antebrachium.
The point we rotate around is changing every time the humerus moves, therefore we need to recalculate it every time we move.
 void move_antebrachium_sinister(double angle)
 {

 //new group of transformations, the group will "add" movements
 var Group_3D = new Transform3DGroup();
 Group_3D.Children.Add(humerus_sinister.Transform);

 //we need to find out where our old point is now
 Point3D origin = Group_3D.Transform(new Point3D(461, 1457, -157));

 //create new transformation
 RotateTransform3D antebrachium_sinister_transform = new RotateTransform3D(new AxisAngleRotation3D(new Vector3D(0, 1, 0), angle));
 antebrachium_sinister_transform.CenterX = origin.X;
 antebrachium_sinister_transform.CenterY = origin.Y;
 antebrachium_sinister_transform.CenterZ = origin.Z;

 //add it to the transformation group (and therefore to the femores movement
 Group_3D.Children.Add(antebrachium_sinister_transform);

 //Apply the transform
 antebrachium_sinister.Transform = Group_3D;
 }
Now the same thing for the other side and this is the result
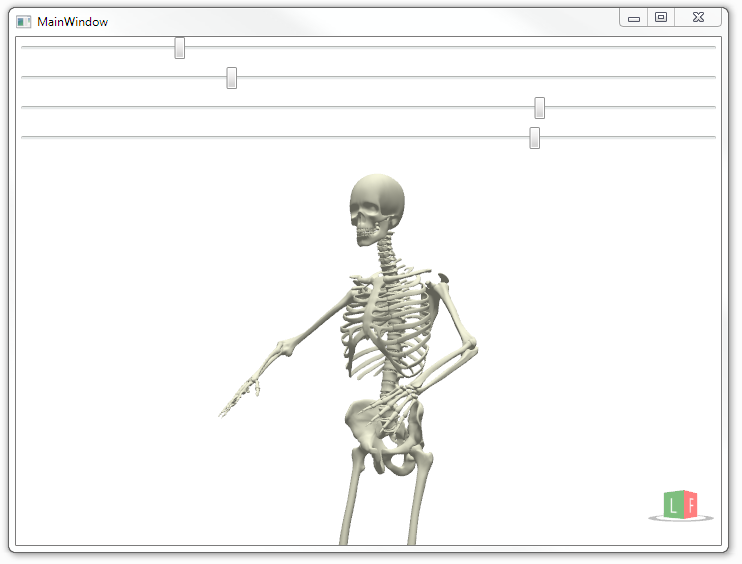
Thats it
Though I’m very sure that there are better and more elegant ways to do it I think that this should be a good starting point as the main challenges and techniques had been discussed. Have fun with WPF and 3D 😉
Code
XAML
<Window x:Class="WPF_3D_getting_started.MainWindow"
 xmlns="http://schemas.microsoft.com/winfx/2006/xaml/presentation"
 xmlns:x="http://schemas.microsoft.com/winfx/2006/xaml"
 xmlns:xctk="http://schemas.xceed.com/wpf/xaml/toolkit"
 xmlns:HelixToolkit="clr-namespace:HelixToolkit.Wpf;assembly=HelixToolkit.Wpf"
 Title="MainWindow" Height="546" Width="721">
 <Grid Name="overall_grid">
 <!-- Sliders to move the model -->
 <Slider Value="{Binding humerus_sinister_angle}" Maximum="90" Minimum="-90" Height="29" VerticalAlignment="Top" />
 <Slider Value="{Binding antebrachium_sinister_angle}" Maximum="90" Minimum="-90" Height="29" VerticalAlignment="Top" Margin="0,30,0,0" />
 <Slider Value="{Binding humerus_dexter_angle}" Maximum="90" Minimum="-90" Height="29" VerticalAlignment="Top" Margin="0,60,0,0"/>
 <Slider Value="{Binding antebrachium_dexter_angle}" Maximum="90" Minimum="-90" Height="29" VerticalAlignment="Top" Margin="0,90,0,0" />

 <!-- Helper to control the small box in order to find points in the 3D world, made invisible -->
 <Grid Name="boxcontrol" Height="81" VerticalAlignment="Top" Margin="0,124,0,0" Visibility="Hidden">
 <xctk:DecimalUpDown Value="{Binding boxheigth}" Margin="10,8,0,0" Height="27" VerticalAlignment="Top" HorizontalAlignment="Left" Width="84" />
 <xctk:DecimalUpDown Value="{Binding boxwidth}" Margin="99,8,0,0" Height="27" VerticalAlignment="Top" HorizontalAlignment="Left" Width="84" />
 <xctk:DecimalUpDown Value="{Binding boxlength}" Margin="188,8,0,0" Height="27" VerticalAlignment="Top" HorizontalAlignment="Left" Width="84" />

 <xctk:DecimalUpDown Value="{Binding boxX}" Margin="10,44,0,0" Height="27" VerticalAlignment="Top" HorizontalAlignment="Left" Width="84" />
 <xctk:DecimalUpDown Value="{Binding boxY}" Margin="99,44,0,0" Height="27" VerticalAlignment="Top" HorizontalAlignment="Left" Width="84" />
 <xctk:DecimalUpDown Value="{Binding boxZ}" Margin="188,44,0,0" Height="27" VerticalAlignment="Top" HorizontalAlignment="Left" Width="84" />
 </Grid>

 <!-- The HelixViewport3D supports camera manipulation, and can be used just like the Viewport3D -->
 <HelixToolkit:HelixViewport3D ZoomExtentsWhenLoaded="True" Margin="0,124,0,0" Name="m_helix_viewport">

 <!-- Remember to add light to the scene -->
 <HelixToolkit:SunLight/>

 <!-- The content of this visual is defined in MainViewModel.cs -->
 <ModelVisual3D Content="{Binding our_Model}"/>

 </HelixToolkit:HelixViewport3D>
 </Grid>
</Window>
C#
using HelixToolkit.Wpf;
using System.Windows;
using System.Windows.Media;
using System.Windows.Media.Media3D;

namespace WPF_3D_getting_started
{
    /// <summary>
    /// Interaktionslogik für MainWindow.xaml
    /// </summary>
    public partial class MainWindow : Window
    {
        //the skeleton a.k.a model
        Model3DGroup skeleton;

        //the small box to find pints in the 3D World
        BoxVisual3D mybox;

        //the parts of the skeleton
        Model3D rest;
        Model3D humerus_sinister;
        Model3D humerus_dexter;
        Model3D antebrachium_sinister;
        Model3D antebrachium_dexter;

        #region Helper_Box_properties
        public double boxheigth
        {
            get { return mybox.Height; }
            set { mybox.Height = value; }
        }

        public double boxwidth
        {
            get { return mybox.Width; }
            set { mybox.Width = value; }
        }

        public double boxlength
        {
            get { return mybox.Length; }
            set { mybox.Length = value; }
        }


        public double boxX
        {
            get { return mybox.Center.X; }
            set { mybox.Center = new Point3D(value, mybox.Center.Y, mybox.Center.Z); }
        }


        public double boxY
        {
            get { return mybox.Center.Y; }
            set { mybox.Center = new Point3D(mybox.Center.X, value, mybox.Center.Z); }
        }

        public double boxZ
        {
            get { return mybox.Center.Z; }
            set { mybox.Center = new Point3D(mybox.Center.X, mybox.Center.Y, value); }
        }

        #endregion


        //property for the humerus sinister movement
        double m_humerus_sinister_angle;
        public double humerus_sinister_angle
        {
            get { return m_humerus_sinister_angle; }
            set {
                move_humerus_sinister(value);
                m_humerus_sinister_angle = value;
            }
        }

        //property for the antebrachium sinister movement
        double m_antebrachium_sinister_angle;
        public double antebrachium_sinister_angle
        {
            get { return m_antebrachium_sinister_angle; }
            set
            {
                move_antebrachium_sinister(value);
                m_antebrachium_sinister_angle = value;
            }
        }


        //property for the humerus dexter movement
        double m_humerus_dexter_angle;
        public double humerus_dexter_angle
        {
            get { return m_humerus_dexter_angle; }
            set
            {
                move_humerus_dexter(value);
                m_humerus_dexter_angle = value;
            }
        }

        //property for the antebrachium dexter movement
        double m_antebrachium_dexter_angle;
        public double antebrachium_dexter_angle
        {
            get { return m_antebrachium_dexter_angle; }
            set
            {
                move_antebrachium_dexter(value);
                m_antebrachium_dexter_angle = value;
            }
        }


        //Property for the binding with the Skeleton
        public Model3D our_Model { get; set; }

        public MainWindow()
        {
            InitializeComponent();

            //The Importer to load .obj files
            ModelImporter importer = new ModelImporter();

            //The Material (Color) that is applyed to the importet objects
            Material material = new DiffuseMaterial(new SolidColorBrush(Colors.Beige));
            importer.DefaultMaterial = material;

            //instanciate a new group of 3D Models
            skeleton = new Model3DGroup();

            //load the files
            rest = importer.Load(@"bones/skeleton.obj");
            humerus_sinister = importer.Load(@"bones/humerus_sinister.obj");
            humerus_dexter = importer.Load(@"bones/humerus_dexter.obj");
            antebrachium_sinister = importer.Load(@"bones/antebrachium_sinister.obj");
            antebrachium_dexter = importer.Load(@"bones/antebrachium_dexter.obj");


            //add them to the group
            skeleton.Children.Add(rest);
            skeleton.Children.Add(humerus_sinister);
            skeleton.Children.Add(humerus_dexter);
            skeleton.Children.Add(antebrachium_sinister);
            skeleton.Children.Add(antebrachium_dexter);

            //skeleton is complete assign it to the global variable
            this.our_Model = skeleton;

            //instanciate Helper box, uncomment to use it

            mybox = new BoxVisual3D();
            mybox.Height = 5;
            mybox.Width = 5;
            mybox.Length = 5;
            m_helix_viewport.Children.Add(mybox);


            //rotate whole skeleton to have it upright
            RotateTransform3D myRotateTransform = new RotateTransform3D(new AxisAngleRotation3D(new Vector3D(1,0,0), 90));
            myRotateTransform.CenterX = 0;
            myRotateTransform.CenterY = 0;
            myRotateTransform.CenterZ = 0;
            skeleton.Transform = myRotateTransform;

            //set datacontext for the sliders and helper
            overall_grid.DataContext = this;

        }

        //moves humerus sinister
        void move_humerus_sinister(double angle)
        {

            //rotate the object by "angle", the vector describes the axis
            RotateTransform3D humerus_sinister_transform = new RotateTransform3D(new AxisAngleRotation3D(new Vector3D(0, 1, 1), angle));

            //tells where the point of rotation is
            humerus_sinister_transform.CenterX = 152;
            humerus_sinister_transform.CenterY = 1480;
            humerus_sinister_transform.CenterZ = -152;

            //apply transformation
            humerus_sinister.Transform = humerus_sinister_transform;

            //also move the antebrachium
            move_antebrachium_sinister(antebrachium_sinister_angle);
        }

        //moves antebrachium sinister
        void move_antebrachium_sinister(double angle)
        {
            //new group of transformations, the group will "add" movements
            var Group_3D = new Transform3DGroup();
            Group_3D.Children.Add(humerus_sinister.Transform);

            //we need to find out where our old point is now
            Point3D origin = Group_3D.Transform(new Point3D(461, 1457, -157));

            //create new transformation
            RotateTransform3D antebrachium_sinister_transform = new RotateTransform3D(new AxisAngleRotation3D(new Vector3D(0, 1, 0), angle));
            antebrachium_sinister_transform.CenterX = origin.X;
            antebrachium_sinister_transform.CenterY = origin.Y;
            antebrachium_sinister_transform.CenterZ = origin.Z;

            //add it to the transformation group (and therefore to the femores movement
            Group_3D.Children.Add(antebrachium_sinister_transform);

            //Apply the transform
            antebrachium_sinister.Transform = Group_3D;
        }

        //moves humerus dexter
        void move_humerus_dexter(double angle)
        {

            //rotate the object by "angle", the vector describes the axis
            RotateTransform3D humerus_dexter_transform = new RotateTransform3D(new AxisAngleRotation3D(new Vector3D(0, 1, 1), angle));

            //tells where the point of rotation is
            humerus_dexter_transform.CenterX = -152;
            humerus_dexter_transform.CenterY = 1480;
            humerus_dexter_transform.CenterZ = -152;

            //apply transformation
            humerus_dexter.Transform = humerus_dexter_transform;

            //also move the antebrachium
            move_antebrachium_dexter(antebrachium_dexter_angle);
        }

        //moves antebrachium dexter
        void move_antebrachium_dexter(double angle)
        {
            //new group of transformations, the group will "add" movements
            var Group_3D = new Transform3DGroup();
            Group_3D.Children.Add(humerus_dexter.Transform);

            //we need to find out where our old point is now
            Point3D origin = Group_3D.Transform(new Point3D(-461, 1457, -157));

            //create new transformation
            RotateTransform3D antebrachium_dexter_transform = new RotateTransform3D(new AxisAngleRotation3D(new Vector3D(0, 1, 0), angle));
            antebrachium_dexter_transform.CenterX = origin.X;
            antebrachium_dexter_transform.CenterY = origin.Y;
            antebrachium_dexter_transform.CenterZ = origin.Z;

            //add it to the transformation group (and therefore to the femores movement
            Group_3D.Children.Add(antebrachium_dexter_transform);

            //Apply the transform
            antebrachium_dexter.Transform = Group_3D;
        }
    }
}
Thank you so much for this great article. It helped me a lot in moving forward with the 3D stuff in WPF.
You are welcome!
hi Thomas;
how about vb.net ?
can we do this in vb ?
Yes, it is possible.
Hi
Thank you, that’s great.
Please insert download link for .obj files beacuse I don’tm have no access to Cinema 4D to export objects. It’s better to upload all your project.
Best regards.
Vahed Mamqaderi
Hello Vahed,
due to copyright issues I can not upload the bones. I can offer you some more neutral .obj files to get started.
Hello.
Can I also load .step files using helix toolkit? or convert them into .obj file?
Thanks.